James Duff Steering
Stabilizer
PN #8311 bracket
PN #8101 stabilizer
Tools:
14mm socket and wrench
3/8 drill bit
Drill
9/16 wrench
4 C-clamp
Black spray paint
Punch
Time = 1 hour
Tips = be sure to check alignment
of parts before drilling any holes. Make sure you have the wheels
centered before starting installation and replace the nuts and bolts supplied
with grade 8 hardware.
Benefits = Reduced bump steering
and following of ruts on the highway. Off-road allow greater reduction
of wheel deflection from rocks, ruts, potholes and obstacles.
Instructions(from the Duff instructions
plus personal input)
1. Replace the 2 3/8 x 1 bolts with
grade 8 ones that are 1 ½ in length. I stripped the treads
on the grade 5 bolts provided in the kit when trying to torque down the
bracket.
2. Place the cross member bracket behind
the right side of the front cross member with the scribe line in the bracket
horizontal. Line that up with the bottom edge of the cross member
and clamp tight.
3. Using the hole in the bracket as a guide,
drill a 3/8 hole through the cross member and bolt the bracket to the
cross member with a 3/8 x 1 1/2 bolt, nyloc nut and 2 washers.
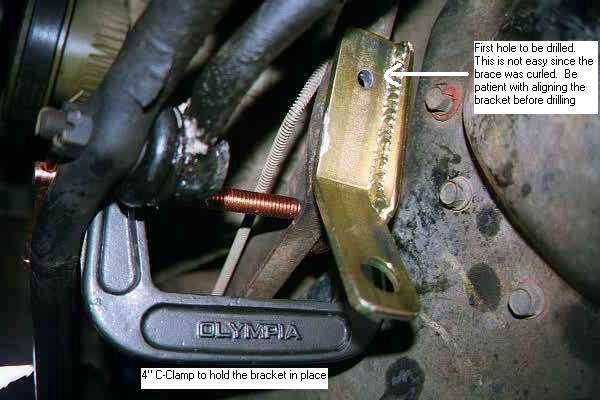
4. With a center punch, mark a spot on
the face of the cross member in the approximate position shown (1 ¼
from the left side of the end of the bracket and ½ up from
the bottom of the cross member.
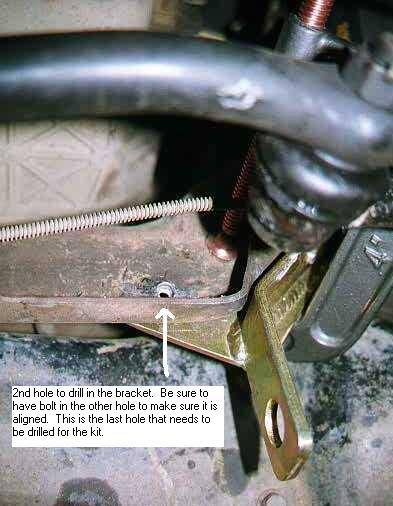
5. Install the remaining 3/8 x 1 1/2
bolt, nut and 2 washers in the new hole. Remove the clamp.
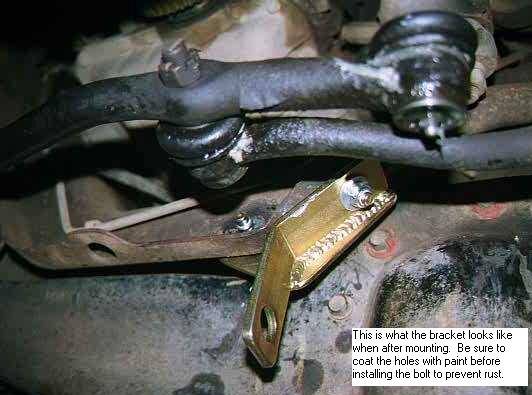
6. Install the drag link bracket to the
drag link. Leave it loose enough so it can be slid up and down the
drag link. Remember the drag link is the bar that attaches to the
steering box and the passenger side wheel.
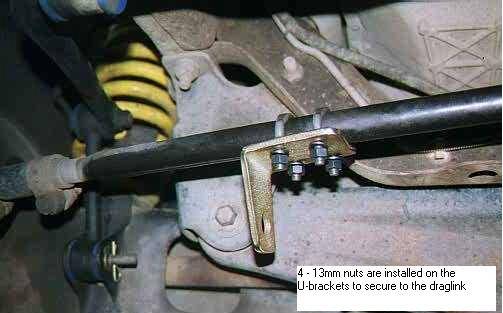
7. Install the boot on the stabilizer.
8. Install the stabilizer on the bracket.
Do not over tighten the bushings or they wont work properly. The
bushing should be tight, but not to the point that the bushing is deformed.
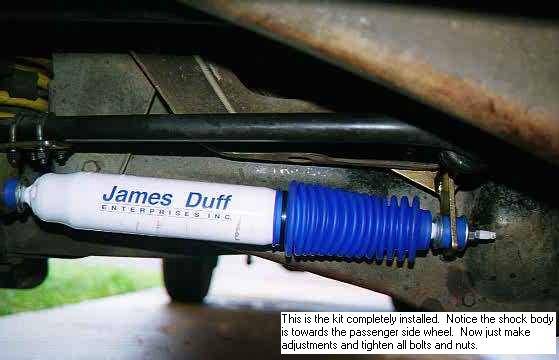
9. Extend the stabilizer until approximately
half the rod length is exposed (about 4 ½ on a James Duff stabilizer)
10. Position the drag link bracket to minimize
and side load on the stabilizer and tighten the bracket to the drag link)
11. To check for proper clearance, rotate
the wheels from lock to lock. Recheck all bolts after 100 miles of
use.
Notes: Some notes on the kit. The
instruction provided have some good drawings to help assist you in your
installation. I have not included these diagram notes here.
A tip from installing a Rancho kit is to turn the wheels to the full right,
then extend the stabilizer fully minus ½. Then tighten the
drag link bracket at that point on the drag link.
EXPLORER HOME | MORE
EXPLORERS
|

