Caliper
Slide Pin Maintenance
by Rick Horwitz
One of the keys to long brake pad and rotor
life for the '91-'94 Explorer is the proper care and feeding of the caliper
slide pins. These pins allow the caliper to float when the brakes are applied
and released. In time and after off-road use the caliper can stick causing excessive
wear of the rotor and pads. Dirt and water are the two biggest
enemies of the slide pins. With frequent maintenance long rotor and pad
life can be achieved. I have 115,000 mile on my original rotors and I'm
on my 3rd set of brake pads, this is with my heavy 33" M/T tires which
have been on the Explorer since it had 500 miles.
Step 1. After jacking up and supporting
your front wheel remove the tire and wheel assembly.
Step 2. Using a screwdriver and
hammer drive out the caliper slide pins strike one side of the pin then
the next until the tabs on the pins clear the caliper and bracket. Drive
the pins in towards the center of the vehicle.
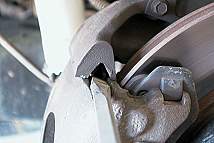 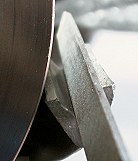
Step 3. Lift off the caliper assembly
and place it on top of the upper ball joint for support. Do not let it dangle
by the hose.
Step 4. Using brake cleaning solvent
use a rag to clean the caliper slide pins and the grooves in which they
travel, check for burrs and caked on grease in the grooves. Remove the
burrs with a light filing and remove the grease with a scraper.
Step 5. Using brake caliper grease
such as Sta-Lube Synthetic Grease lightly coat the grooves and slide pins
with a VERY thin layer of grease.
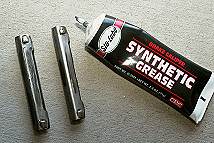 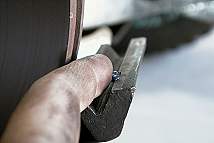
Step 6. Place the caliper back in
the bracket, insert the top pin with the V towards the top (it's not actually
a V it's just narrower at one end). Only insert about 1/2" at this time.
Insert the lower pin with the V pointing down and proceed to drive both
pins in until the tabs pop out the back side.
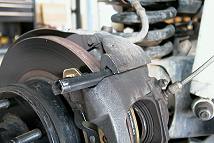 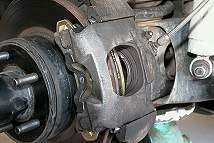
Step 7. Pump your brakes to build
pressure and seat the caliper and brake pads. Bleed the brakes to remove
any accumulated air. Reinstall wheel and tire assembly tighten lug nuts
and continue to the next side.
Conversion
from Auto to Manual Warn Hubs:
Necessary Equipment:
-
1/2" socket wrench and/or 1/2" drive torque
wrench
-
Hub socket/tool (for '86 and newer fords with
the Dana 44 axle)
-
Chisel
-
Hammer
-
Magnet
-
Regular screw driver
-
Jack, and jack stand
-
3/4" deep socket for removing the lug nuts
-
Warn Hubs p/n 29071
-
Conversion kit p/n 27997 (early '90
and later 27 spline axle)
-
*** for earlier vehicles - p/n 27988 ('83-early
'90 with 23 tooth spline axle)
The cost of the hubs and the conversion
kit was $185. Then the cost of the
wheel bearing socket was $13. Time
to do the conversion at a leisurely
pace was about 1.5 hours.
1. Start by removing the center caps
of the wheels and then loosen the
lug nuts while the tires are on the ground
with the 3/4' deep socket.
Once the lug nuts are loosened,
jack one side of the vehicle off
the ground and secure with jack stands.
2. Remove the lug nuts and the wheels
3. Once the wheels are off, you can
remove the speed nuts (if
present) and the auto-hub from the drive
shaft.
4. Remove the axle shaft ring with
the regular screw driver and hammer
(gently). Once the shaft run is
removed, the axle shaft spacer can be
removed.
5. Now give a gentle pull on the
plastic cam assembly, it comes free
from the wheel bearing nut.
6. Now you have to remove the locking
key from the wheel bearing
adjusting nut. Make sure the key
is centered with the wheel bearing nut
and it comes out very easily with a magnet.
They also suggest a paper
clip to retrieve it if you don't have
a strong magnet.
7. Now with the locking key removed, you
have to remove the wheel
bearing nut. Mine was six sided,
not the normal 4 sides that you usually
hear about. The local parts store did
not have a bearing socket large
enough to fit it, not even the one for
a 3/4 ton Ford. If you have a
bearing socket that fits, just remove
the wheel bearing nut with that.
If not, that is where the chisel and hammer
comes in. Pound on the
wheel bearing nut on a flat side with
enough angle to get it to thread
off. Mine was already scored from
this service by a local tire company
a few years ago, so it made it easier.
8. No you have everything removed.
You need to keep the axle shaft
ring and spacer to reuse with the manual
hubs. Remove everything else,
you can toss it or whatever.
9. Install the inner adjusting nut
(nut with the pin; the thickest of
the 2 nuts supplied with the conversion
kit from Warn). Toque that to
35lb-Ft and then back off 90 degrees and
re-torque to 16lb-Ft.
10. Then install the bearing retainer washer
( the one that is thin with
many holes in it) against the the adjusting
nut. This washer is keyed,
and takes the place of the locking key
from the auto hubs.
11. Now install the outer bearing
nut and torque to 150lb-Ft.
12. Replace the axle shaft spacer
and the axle shaft ring.
13. Install the new manual hub.
14. Replace the wheel and the lug nuts.
Torque the lug nuts to
75-100lb-FT with the wheel on the ground.
Then replace the center cap
and repeat for the other side.
This is a very easy job to do. If
you have never taken apart the hubs
on the Fords, allow an extra 30 minutes
to figure it out. There is also
a lot of other services that you could
do at the same time such as:
-
Front brakes
-
Use brake grease on the caliper slide pins
-
Repacking front wheel bearings
-
The needle bearings inside the spindle need
to be greased
-
The right front drive shaft splines need a
bit too
-
The u-joints in the front need to be checked/replaced
as necessary.
Submitted by,
Matt Bobbitt
EXPLORER HOME | MORE
EXPLORERS
EXPLORERFORUM MESSAGE BOARD
Copyright 2008 Rick Horwitz Photography
|


