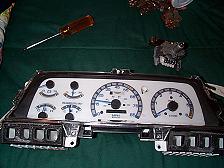
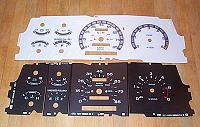
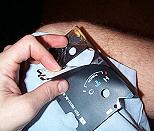
When installing these gauges you need to make
sure you know were your needles positions were originally. Also it is NOT
a good idea to paint the needles!!! I had two sets of needles when I installed
mine I painted one set. The weight of the added paint caused the
speedo to read too low. On average about 10 mph.
There will be different steps for different models. '91-'92 Explorers
will have to make a jumper to get the brake light to work. The '91 - '93s
will have to add three holes to the new gauges if your's came with three
screws on the tach.
First you need to remove the dash trim. The trim is held in place
by metal clips and just pops out. You also need to remove the ashtray and
mounting brackets. Some models will need to remove the stereo head unit.
On Automatic models it will help to shift the car into 1st gear to help
get the dash trim out of the way.
Remove the screws from the clear cover and the black trim ring from
the cluster. There is no need to remove the cluster unless you have to
jumper the brake light. Now you can remove the tach, temp and gas gauges.
These gauges will pull right out of the cluster. You need to remove the
needle from the speedo with the tool supplied with the gauge set. Next
remove the two screws from the speedo. The plate for the speedo will come
off now.

For '91-'92 Models you now need to remove the rest of the cluster
to jumper the brake light. Remove the rest of the speedometer. There is
a quick release on the bottom were the cable meets the speedo. Next
remove the screws to the white part of the cluster. Pull out the cluster
far enough to disconnect the wiring connector on the back of this piece.

You need to move the brake light to the right one position on the
cluster. You can wire one socket to another and make a hole in the spot
for the light but you will need a second socket for this. This is what
I did and it seems to work well. Once you have the jumper made you can
reinstall the white plate.
Remove all the needles and stops from the gauges.

You will now need to remove the black face from the original gauges.
(Tach's with three screw
need to remove the screws from the tach before peeling the black
face off and use the original black face to drill the holes in the white
gauges.) Once removed you can clean to plastic to get all the original
glue off but it is not necessary.
After the black gauges have been removed. You now can lay down the
new face.
Reinstall gauges in reverse order.
Ones you have the needles on leave you dash open and start the car
to make sure the needles go in the right position. (Note) this can be very
nerve racking It might take a several (or more) tries to get it right.
Reassemble the dash.
EXPLORER HOME | MORE
EXPLORERS
|


